
Apple Pay in QuickStream
Apple Pay allows customers to make purchases using a credit or debit card from their Apple wallet. As a business, accepting Apple Pay makes it easy and secure for your customers to make purchases on mobile and desktop websites using Touch ID or Face ID.

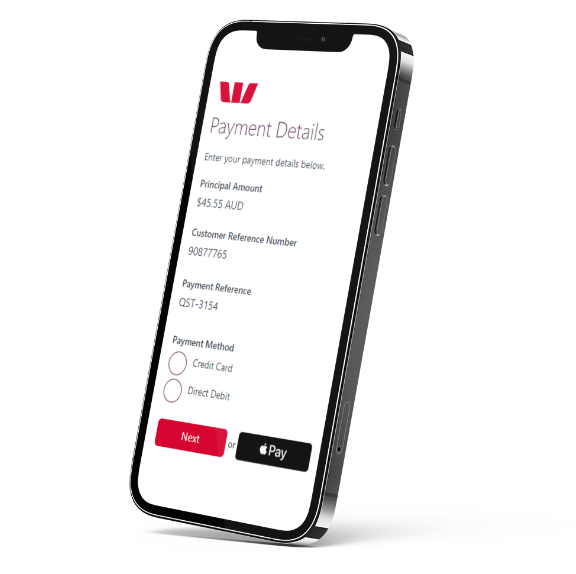
Use QuickStream to accept Apple Pay on the web as a payment method to your own payment page by creating a Payment Request button using the QuickStream REST API.
Every payment is securely authenticated with Touch ID, Face ID or passcode.
Offer a one-click payment experience to your customers without them having to manually enter credit card or shipping details.
Getting started
To accept Apple Pay as a payment method in QuickStream, you must integrate with the QuickStream REST API and register each domain you would like to accept Apple Pay payments on. Follow these steps:
- Sign in to QuickStream to Configure Apple Pay.
- Follow the instructions to register your domains, download your domain verification file and upload your certificate.
- Integrate with QuickStream REST API and implement Apple Pay on the web or in-app.
Reporting
Use these methods to find Apple Pay transactions made through QuickStream:
- You can find Apple Pay transactions in QuickStream portal.
- Use the Transactions API to find Apple Pay transactions.
- Download a CSV report containing Apple Pay transactions using QuickStream portal and the REST API.
- If you have applied for BankRec, you can link QuickStream to a BankRec facility to automate in-depth bank statement reconciliation for every payment made.
Refunds
Refund Apple Pay transactions using QuickStream portal and the REST API.
Settlement and response codes
- Transaction processing and settlement for cards.
- Transaction response codes for cards.
Apple Pay support in QuickStream
- Apple Pay is supported on browsers and devices compatible with the Payment Request Button.
- QuickStream does not support subscription payments or account verification/$0 authorisations through Apple Pay.
- Apple Pay credentials cannot be stored with QuickVault.
Apple Pay on the Web with QuickStream REST API
Our QuickStream REST API allows you to create a Payment Request Button in your payment form with QuickStream-API.js.
Getting started
This section explains how to add Apple Pay on the Web to your existing QuickStream REST API integration. If you haven't done this integration yet, refer to our API reference and the QuickStream-API.js library reference.
Before starting your Apple Pay on the Web integration:
- Make sure that you have received your Publishable and Secret REST API keys for our QuickStream REST API.
- Register each domain via which you will accept Apple Pay payments and follow the instructions.
- Create a payment form that you want to add an Apple Pay button to. Your payment form is a webpage that you will display to your customers when they choose their payment method.
- Serve your application over HTTPS. This is required for test and production environments. You can use a service like ngrok to do this.
- Set up your back-end implementation to take a payment using the Transactions API.
How to implement Apple Pay in your payment form
-
Add the QuickStream-API.js library to your payment form. For New Zealand based businesses: replace the
srcurlhttps://api.quickstream.westpac.com.au/rest/v1/quickstream-api-1.0.min.jswithhttps://quickapi.paymentsonline.co.nz/rest/v1/quickstream-api-1.0.min.js.<script type="text/javascript" src="https://api.quickstream.westpac.com.au/rest/v1/quickstream-api-1.0.min.js"></script> -
Add the Payment Request Apple Pay Button Container to your payment form that will drop-in the Apple Pay button on supported Apple devices.
<div data-quickstream-api="paymentRequestApplePayButtonContainer"></div> -
Initialise QuickStream-API.js with your Publishable API key for your QuickStream facility.
QuickstreamAPI.init( { publishableApiKey: "PUBLISHABLE_API_KEY" } ); -
Create the PaymentRequestConfigObject for your customer.
var config = { supplierBusinessCode: "SUPPLIER_CODE", // This is required details: { total: { label: "Your company name", amount: { value: "10.00", currency: "AUD" } } } }; -
Create the Payment Request Button with the PaymentRequestConfigObject.
Handle errors or retrieve the
singleUseTokenIdproperty from the PaymentRequestResponseObject.QuickstreamAPI.paymentRequestButton.createAllButtons(config, function(errors, paymentResponse) { if (errors) { // Handle errors here } else { console.log("singleUseTokenId is " + paymentResponse.singleUseTokenId); // perform the payment on your server here before calling below. paymentResponse.complete("success"); } });
Take a payment
-
After obtaining the
singleUseTokenIdpass this to your server. -
From your server, request POST
/v1/transactionsusing your Secret REST API key, specifying:singleUseTokenId: ThepaymentResponse.singleUseTokenIdfrom thecreateAllButtonsfunction.
POST / HTTP/1.1
Host: https://api.quickstream.westpac.com.au/rest/v1/transactions
Authorization: Basic A8d8sdk938damcheyt7=
Idempotency-Key: a8f4bd70-5435-11ea-8d77-2e728ce88125
Content-Type: application/json

{
    "transactionType" : "PAYMENT",
    "singleUseTokenId": "dec2075f-da92-49df-8a92-f7e494f89c22",
    "supplierBusinessCode": "SUPPLIER_CODE",
    "principalAmount": 10.00,
    "currency" : "AUD",
    "eci": "INTERNET",
    "ipAddress" : "192.168.1.1"
}
See Process a transaction using a single-use-token for more.
The response contains the result of the payment.
For New Zealand based businesses: replace the
Hosturl above (https://api.quickstream.westpac.com.au/rest/v1/transactions) with the New Zealand urlhttps://quickapi.paymentsonline.co.nz/rest/v1/transactions. You may also need to change the currency depending on your specific business needs.
Present the result
Use the status that you received in your transaction response to present the result to your payer by updating the Payment Sheet using the PaymentRequestResponseObject complete function.
QuickstreamAPI.paymentRequestButton.createAllButtons(config, function(errors, paymentResponse) {
    if (errors) {
        // Handle errors here
    } else {
        // provide success or fail to present the result to the client
        paymentResponse.complete("success");
    }
});
Apple Pay in an App with QuickStream REST API
Our QuickStream REST API allows you to implement the Apple Pay Direct Integration method for use within an app.
Getting started
This section explains how to add the Direct Integration method for Apple Pay to your existing QuickStream REST API integration.
If you haven't done this integration yet, refer to our API reference.
Before starting your Apple Pay in an App integration:
- Make sure that you have received your Publishable and Secret REST API keys for our QuickStream REST API.
- Obtain an Apple Merchant ID.
- Sign in to QuickStream, go to Facility Settings -> Apple Pay Configuration -> Add an iOS Certificate. This process involves:
- Downloading a Certificate Signing Request from QuickStream.
- Exchanging the CSR with Apple for a Payment Processing Certificate.
- Uploading the Payment Processing Certificate to QuickStream.
- Set up your front-end implementation to create a Single-use Token using the Single-use-tokens API. You may wish to fetch your Publishable API Key from your server.
- Implement Apple Pay as a payment method in your app.
- Set up your back-end implementation to take a payment using the Transactions API.
How to implement Apple Pay in your app
Refer to Apple Developer - Setting up Apple Pay and Apple Developer - Offering Apple Pay in Your App.
Part 1 - Payment configuration
In Apple Developer - Offering Apple Pay in Your App:
- (Optional) Under "Add the Apple Pay Button" you may use your Publishable API Key to retrieve your Accepted Cards using the Businesses API.
- Apple uses
CHINAUNIONPAYrather thanUNIONPAY.
- Apple uses
- Under "Start the Payment Process" set the merchant capabilities:
capability3DScapabilityCreditcapabilityDebit
(Optional) Part 2 - Display card surcharges
In Apple Developer - Offering Apple Pay in Your App under "Start the Payment Process" you may use your Publishable API Key to retrieve your Card Surcharges using the Businesses API to display this to your clients. Refer to Surcharging below for more.
Part 3 - Create a Single Use Token
In Apple Developer - Offering Apple Pay in Your App under "Handle Payment Success or Failure" retrieve a singleUseTokenId using your Publishable API Key and the Single Use Tokens API with the following values:
supplierBusinessCodeaccountType=APPLE_PAYdisplayAccountNumber= Retrieve the last 4 digits of the value fromPKPaymentMethod displayName.applePayToken=PKPaymentTokenas JSON.
Part 4 - Take a payment
After obtaining the singleUseTokenId pass this to your server.
From your server, request POST /v1/transactions using your Secret REST API key, specifying the singleUseTokenId.
Part 5 - Present the result
In Apple Developer - Offering Apple Pay in Your App under "Handle Payment Success or Failure" process the result of the payment.
- See Process a transaction using a single-use-token for more.
- The response contains the result of the payment.
- Use the
statusthat you received in your transaction response to present the result
Surcharging
Surcharging works the same as normal card payments. The Apple Pay credential (i.e. DPAN or FPAN) is sent to QuickStream and QuickStream calculates the surcharge based on the Card Scheme Surcharging configuration that can be set in the QuickStream portal.
QuickStream does not know the card before the user approves the payment sheet meaning it cannot calculate and show the total amount to the user before it is approved.
By default, the payment sheet for Apple Pay on the Web will show <Supplier Business Name> (surcharge may be added) when surcharging is configured for a supplier business.
You can change this label to display whatever you want during:
- the initialisation of the payment sheet
- the
onShippingAddressChangeevent - the
onShippingOptionChangeevent
See the details.total.label property.
If you want to show the surcharge amount, you may be able to use multiple line items. For example, if you have configured all card schemes to have the same surcharge amount, you can calculate and provide the surcharge value earlier in the flow than usual.
Multiple line items
You can provide the details.displayItems property which is an array of amount line items.
details: {
  displayItems: [
    {
      label: "Service 1",
      amount: { currency: "AUD", value: "6.00" }
    },
    {
      label: "Service 2",
      amount: { currency: "AUD", value: "4.00" }
    },
    {
      label: "Surcharge",
      amount: { currency: "AUD", value: "1.00" }
    }
  ],
  total: {
    label: "Total amount",
    amount: { currency: "AUD", value: "11.00" }
  }
}
Testing Apple Pay with QuickStream
The QuickStream test environment is linked to the Apple Pay test environment. You can test the payment process using the Apple Pay Sandbox Testing page.
- You require an Apple account to use for Apple Pay Sandbox Testing with test cards. Real cards in an Apple Wallet will not work. The Apple Pay payment sheet will reject before it reaches QuickStream's servers.
- Register each domain via which you will accept Apple Pay payments. You do not need to host the domain verification file in test.
Refer to:
- QuickStream REST API reference for testing, duplicate payments and error handling requirements.
- Apple Pay Marketing Guidelines.
- Apple Pay Human Interface Guidelines.
Go Live
Once you are ready to go live you must:
- Create an Apple account to add real cards to your Apple Wallet. You cannot use test cards in Production.
- Sign in to QuickStream and register each domain via which you will accept Apple Pay payments and follow the instructions verify your domain with Apple Pay.
- Complete your integration with the QuickStream REST API in the production environment.